
|
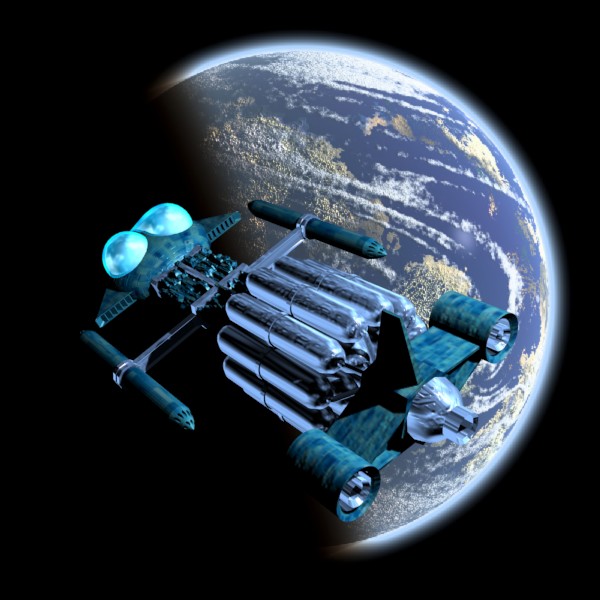
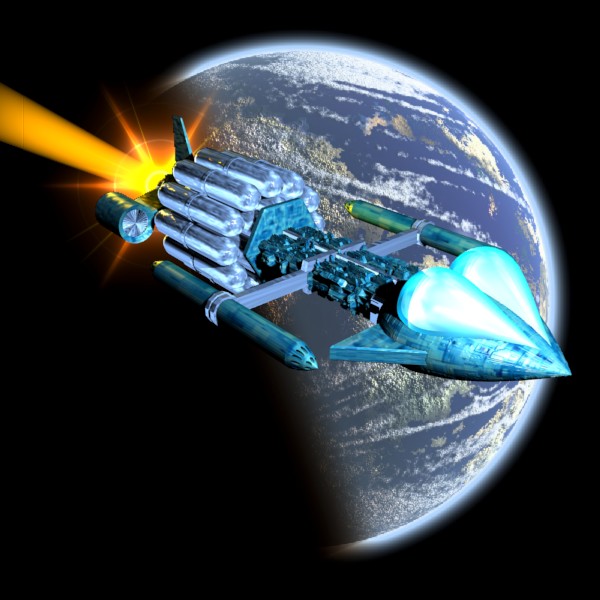
Here's the System-ship with a quick-and-dirty Lunar Cell planet background, and a first pass at texturing Yes, I know the texture are really hideous. You see, I'm torn between using a white color scheme as favored by NASA and 2001: A Space Odyssey, and the shades of blue like on the cover painting. I went with blue and got this mess. The propellant tanks and engines were easily painted with blue tinted chrome. Unfortunately this makes the ship look like the little toy spaceships I had as a child, with garish plastic parts accented with little chrome plated bits. As a unifying influence I made the cross-bracing and missile pod struts blue chrome as well. When I get around to it, I will separately texture the pipes and the waist bands on the tanks. The rest of the ship was done with a very subtle bump map using Todd Zircher's map, and painted with Psionic's hull plate tinted blue. Looks like rectilinear blue-cheese. At least I got the bug-eyes looking halfway the way I wanted them to. |
|
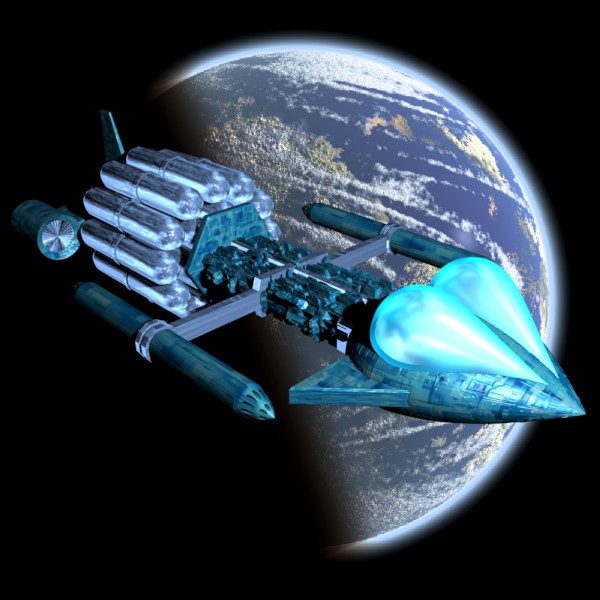
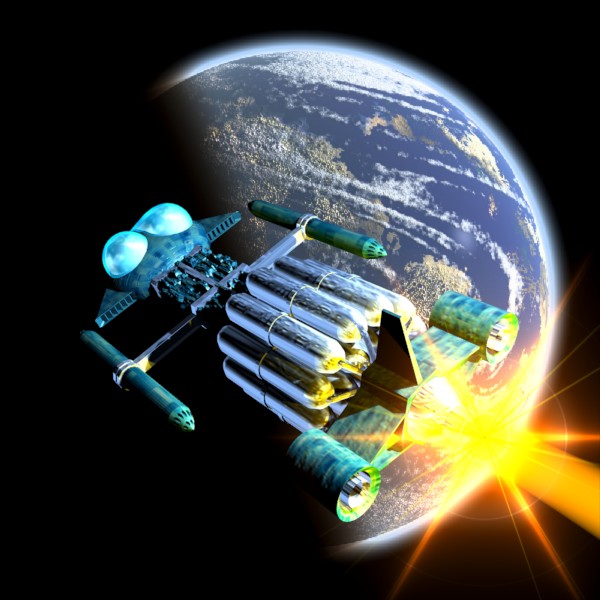
A blue ship with blue chrome against a blue planet is something only a Blue Meanie would love. A Yellow Submarine would be a nice contrast, but a bit out of place. So I settled for orange-yellow exhaust jets, instead of ion-drive blue. To properly do exhaust jets one needs to use Blender's particle systems, but so far they are fighting me tooth and nail. I cannot yet manage to make them behave the way I want. So instead I faked it with floodlamps with volumetric lighting. One orange floodlamp choked down to about five degrees with a volumetric light, stuck in the main exhaust port. A set of three wide angle orange floodlamps cast a subtle orange glow over the aft end of the ship. And a single vertex is set to Blender's Halo texture, with the Star, Circle, and Rays options, to make the flare at the exhaust port. |
|
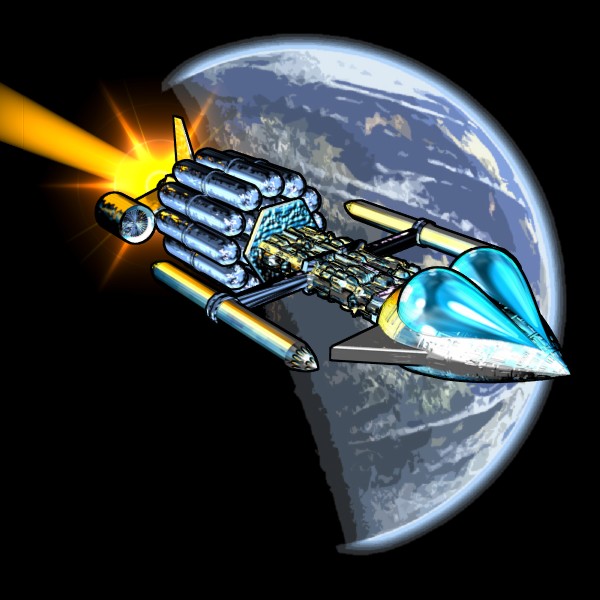
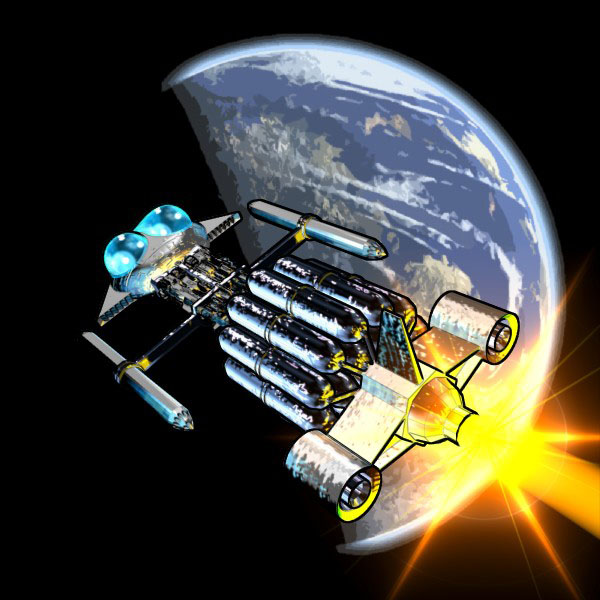
Again this is what the last two images would look like if they were in a graphic novel. Materials were set to the Toon render, and the board drawing was set in the renderer. The background planet image was tweeked in Adobe Photoshop. |
|
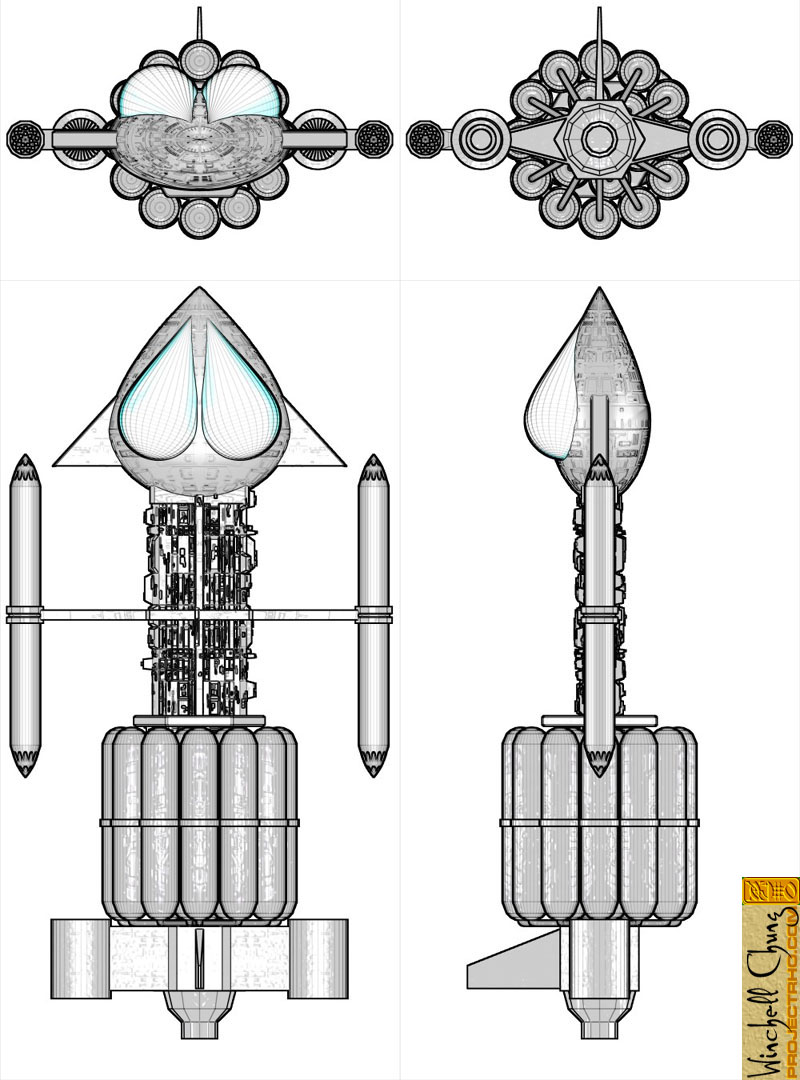
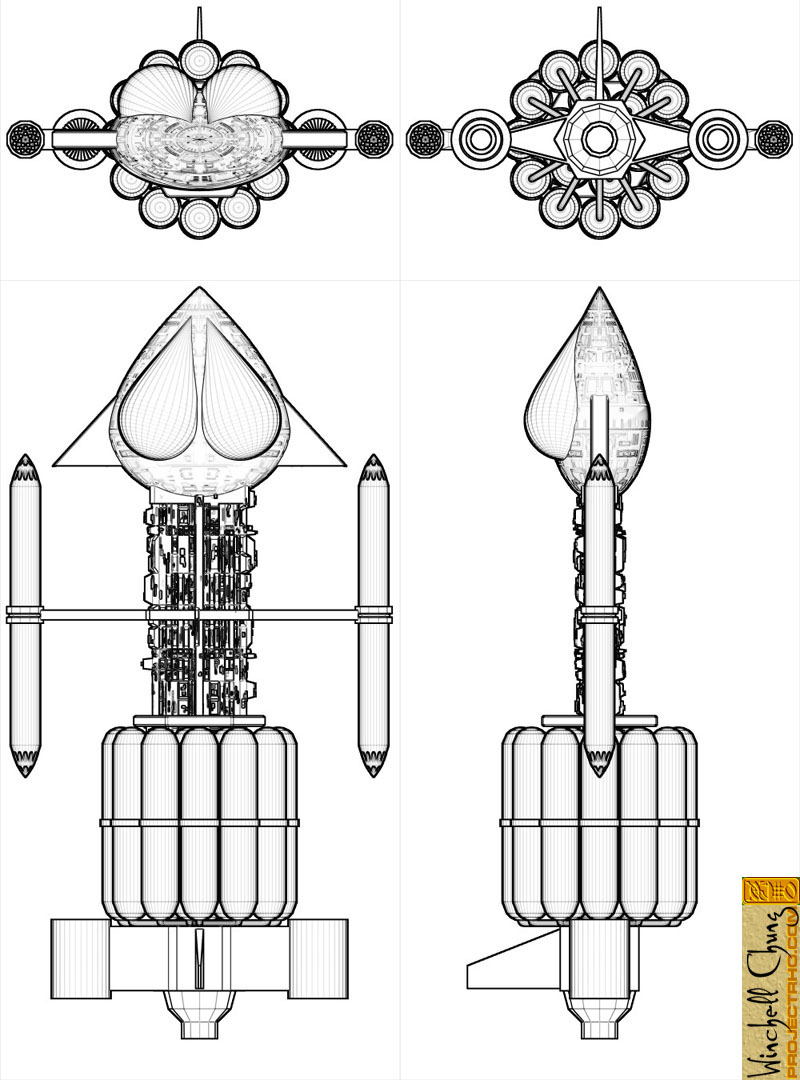
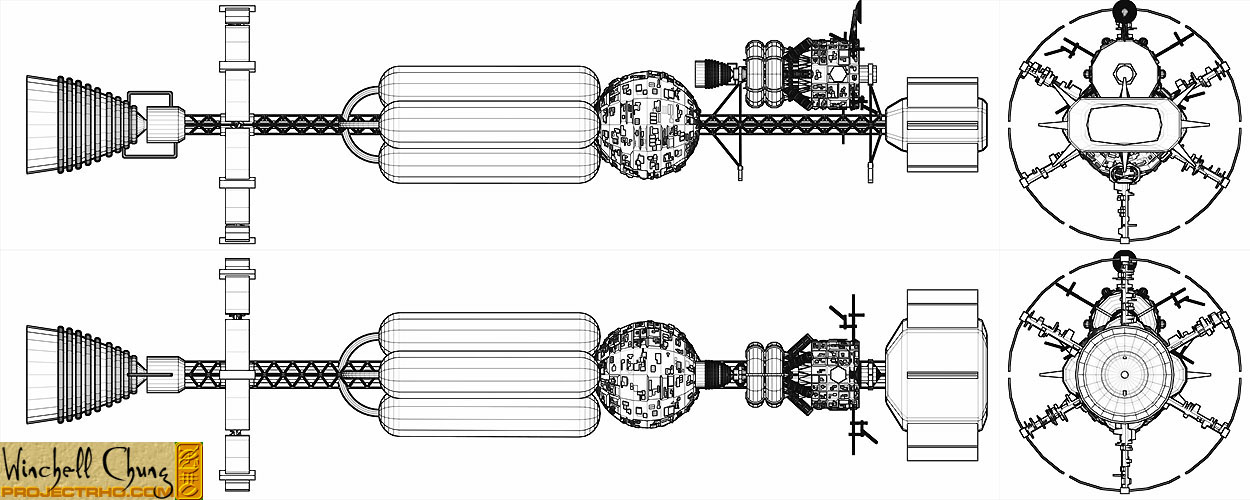
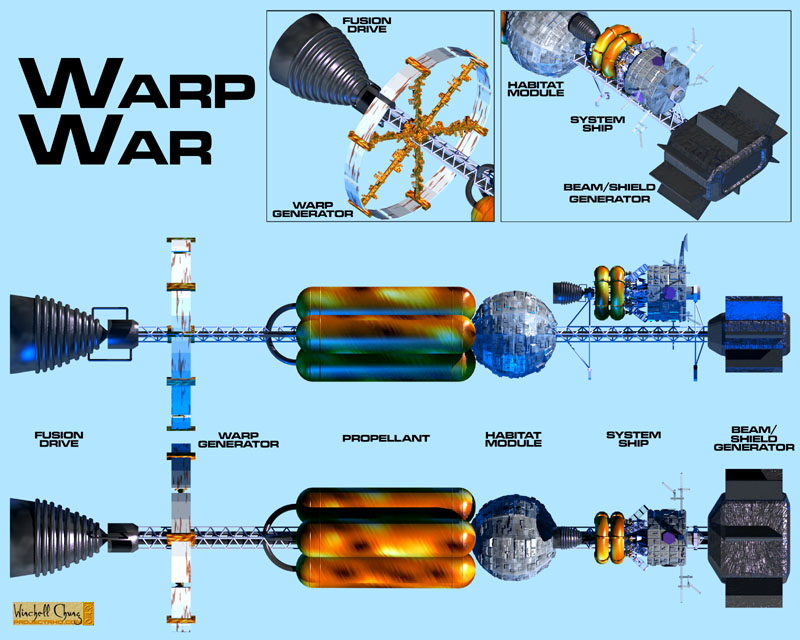
With certain settings in Blender, you can create instant blueprints. The images were rendered at 1000x1000 to make thin lines, they were re-scaled in Photoshop to 800x800 and the four images were combined into one. The settings? The background was set to white. All the materials were set to "Toon Render" with a pure white material. COL textures were deleted, but NOR or DISP textures were retained. The renderer's outline function was turned on and set to 25, with all the other options on. Two hemispheric lights were added, one above and one below. The cameras were spaced around the model, and set to Ortho mode with scaling to make the image just fit the scene. The faint gray shading can be eliminated entirely for true blueprints, I left it in for the first image because I found it artistically interesting, the shadless version is the second. The shading is removed by setting each material to "shadedless". |
|
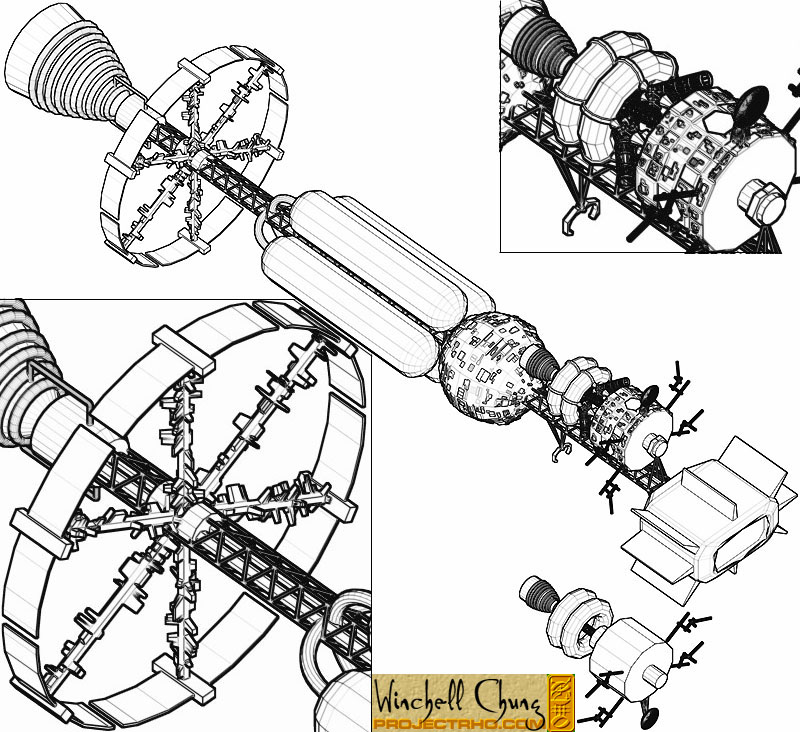
And we can't forget the WarpShip. |

|
Wow! It even does it orthogonally!. |
|
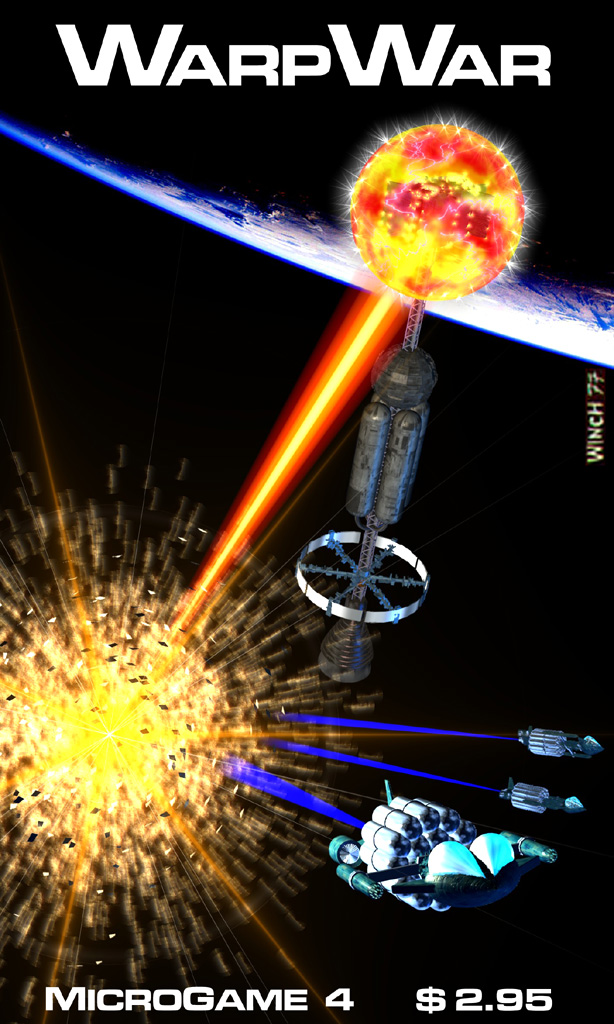
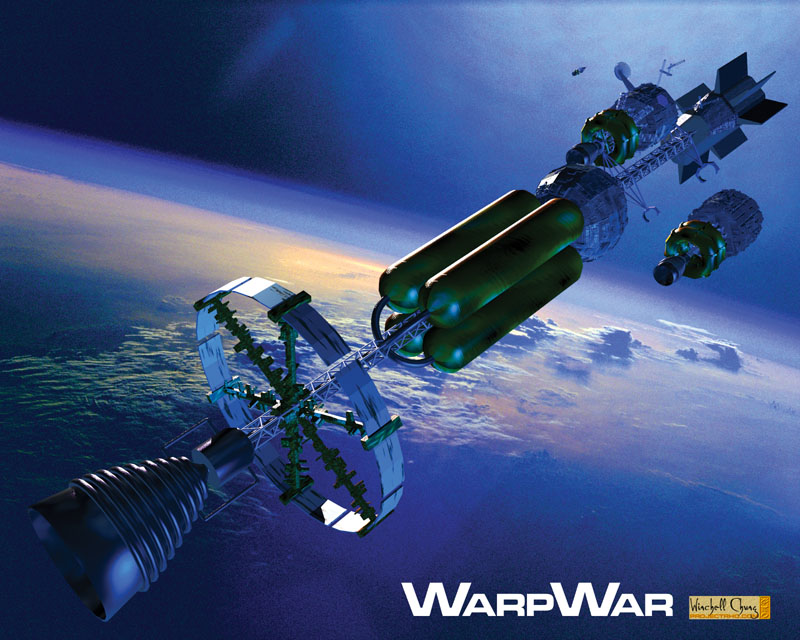
Here's an attempt to recreate the cover. |
|
Beauty shots of the warpship. Shameless plug: images
are available as
poster.
|
