 |
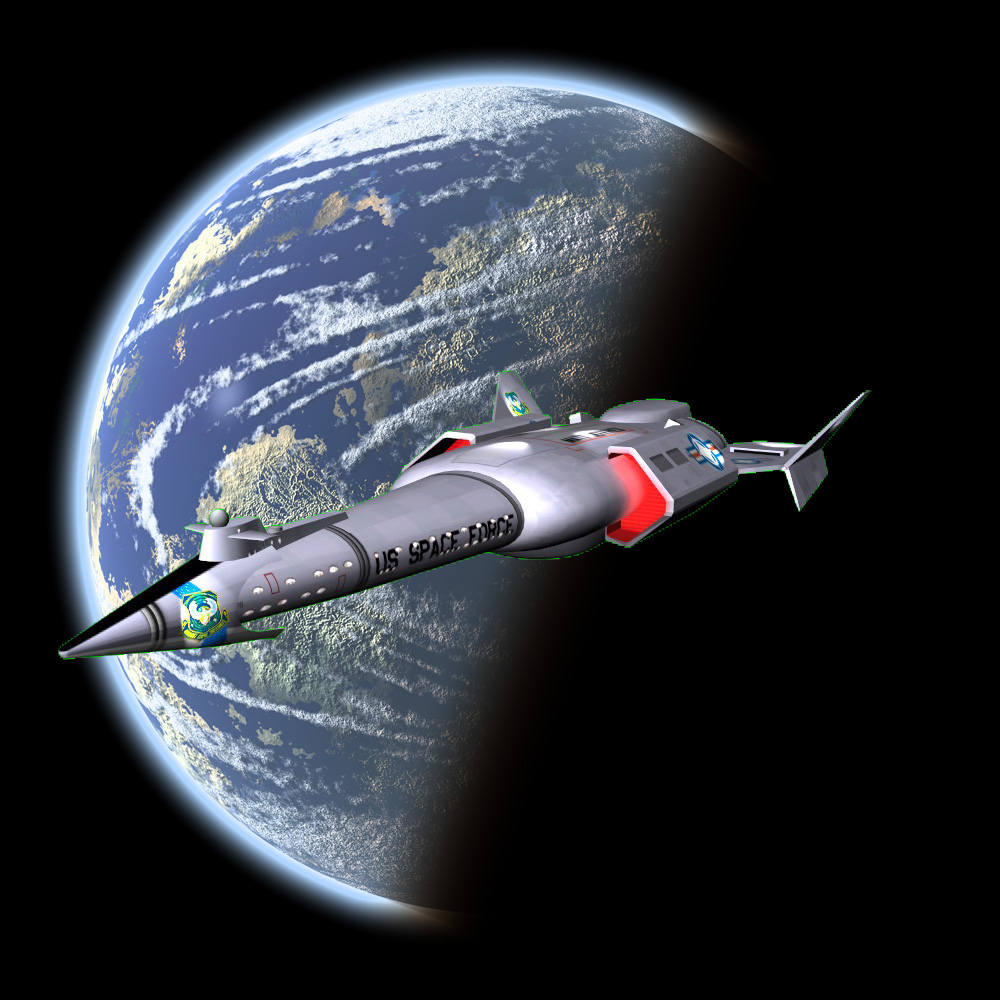
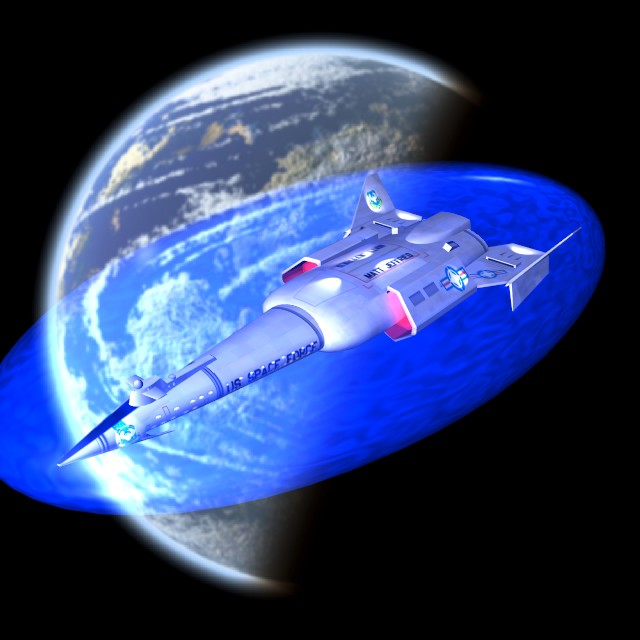
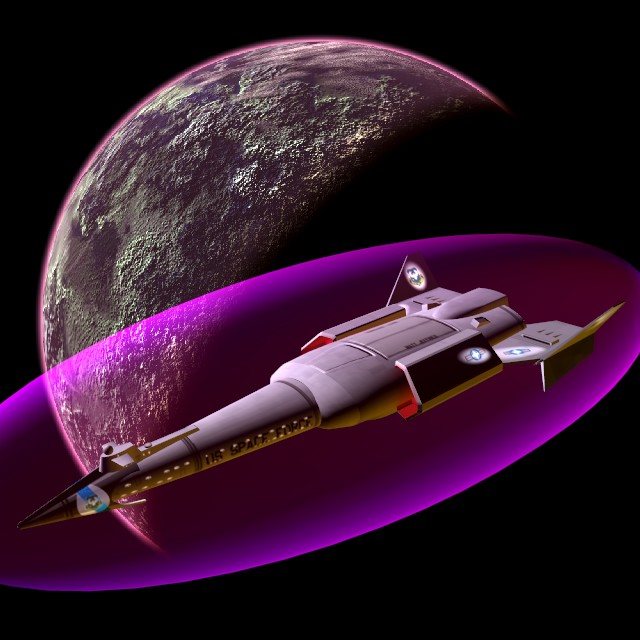
Using a plug-in for Adobe Photoshop called LunarCell, I make a backdrop image of a random planet in 0.3 seconds. In Blender, I make the background solid green, import the image into Photoshop, delete the green and add the LunarCell planet. This explains the slight green outline. Later I feel really silly when I discover that Blender can automatically load into the background any image you want. Oh well, at least the red illumination from the engines is looking nice. A computer artist named Rachel Kronick looked at the image and gently pointed out that the lighting on the planet and the starship were apparently coming from two different suns. Whups. |
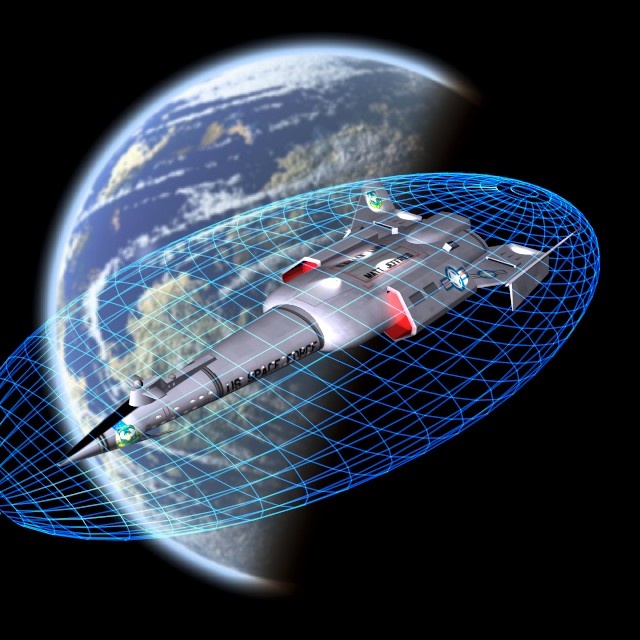 |
How about a Force Field? You know some client is going to want you to draw one, sooner or later. This is a quick elliptical solid, with the surface set to draw just the mesh lines. The egg shape took a bit of stretching to keep the tail tips from sticking out. Since the ship has tail surfaces extending upwards from the centerline, but nothing much extending downwards, I wound up making the ship off-axis in the elliptical solid. In a misguided attemtp to prevent the image from looking like a photo of a plastic model in front of a beach ball, I fuzz out the planet image, to simulate it being out of focus. Rachel points out with long lenses, spacecraft next to planets do look like photos of a plastic models in front of a beach balls. |
 |
This force field was done using this tutorial. |
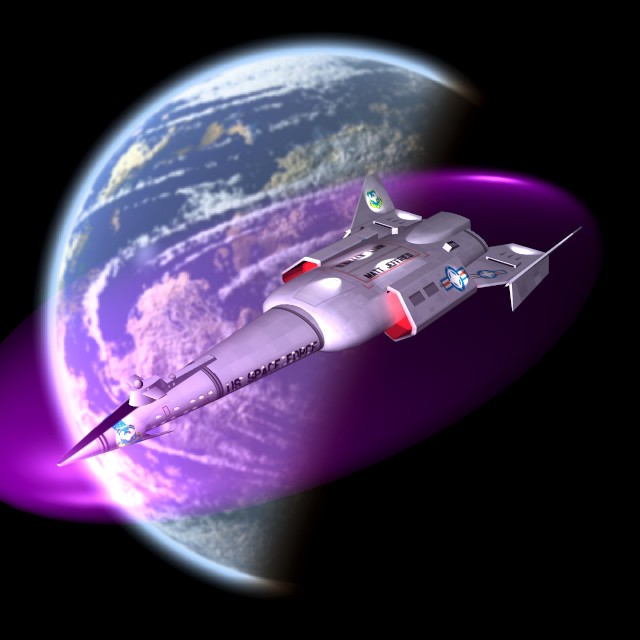 |
Translucent purple. |
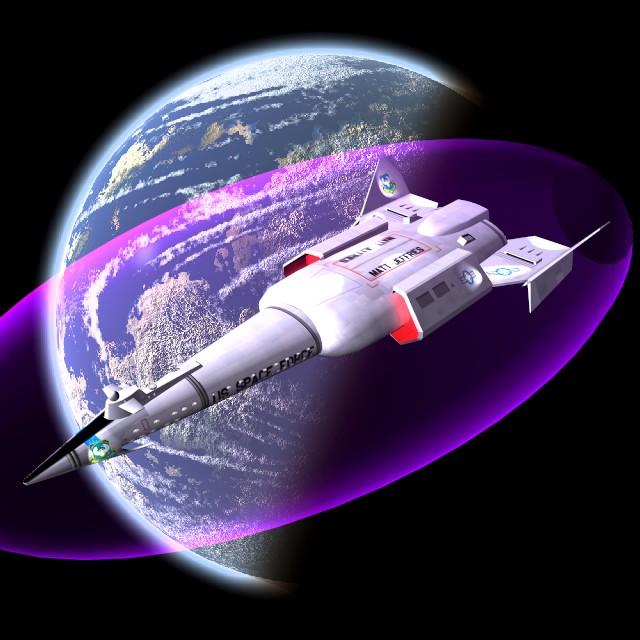 |
The planet is belatedly brought back into focus. Rachel mentions that when she does force fields, she uses incidence based gradients. This makes it colored on the edge, where the angle of incidence is large, and transparent in the center, where the incidence is small. In Blender, this is done with Ramp Shaders. I used it to make the violet force field bubble. Rachel pointed out that large insignia on the engines and the wing make the starship look like a child's toy. She was right. I reduced their size, and what a difference it makes. Just compare this image with the previous one. |
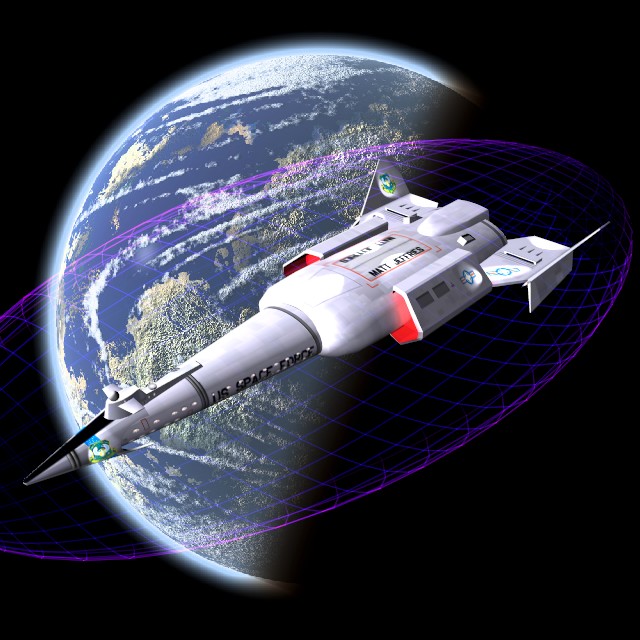 |
A combination of the grid force field with a ramp shader. |
 |
Lots of new techniques learned! "Bump" maps (Blender uses Displacement maps and NOR maps) are grayscale images. Where the image is 50% gray, the starship skin is unchanged. Where is it white or light gray, the skin produces a protrusion. Where it is black or dark gray, the skin produces a hollow. As you can see, a bump map has created incised lines on the hangar bay doors. Remember how the spotlights were produed by an illumination map? I got rid of that and started using real Blender spotlights. I mounted each on the tail or other tall item, aimed them at the insigina, and fiddled with them until the insignia was spotlighted. Much better. Unfortunately there does not seem to be a good place to put a spotlight for the nose cone logo. Rachel suggested putting tiny nurnies at the spotlight origins, and I will as soon as my mesh making skills improve. As Rachel puts it, you can never have too many nurnies. But the most valuable and powerful technique I learned this week was how to use Blender to do "virtual decals". I had to decipher a cryptic tutorial, but it was worth it. The result is analogous to applying a waterslide decal to a plastic model. (since then I've discovered a better tutorial) First and most mundanely, this allows one to use decals of large resolution, which my texture maps did not allow. If the source image is a Targa file, it can have an "alpha channel" (i.e, parts of the decal can be transparent). But most importantly, the decal can be easily repositioned until it is perfect. As an example the hangar was originally applied as a texture map. Unfortunately it was somewhat off-center. Even more unfortunately, as compared to the blueprints, they were the wrong size and shape. There is no easy way to fix this on the texture map. Enter the magic of virtual decals. I made a decal of the hangar doors using the actual blueprint as a source image. I added an alignment dot at the start of the hump at the rear. I applied the decal on the top, scaled it up to the right size, and slid it back until the alignment dot kissed the hump. Done! I had to eyeball the size, using the fact that the hangar doors were approximately the same length as the engines. Then I made a second virtual decal for the hangar door bump map. |